Calling modes
On your first sign-in, the application will ask you to select your calling mode.
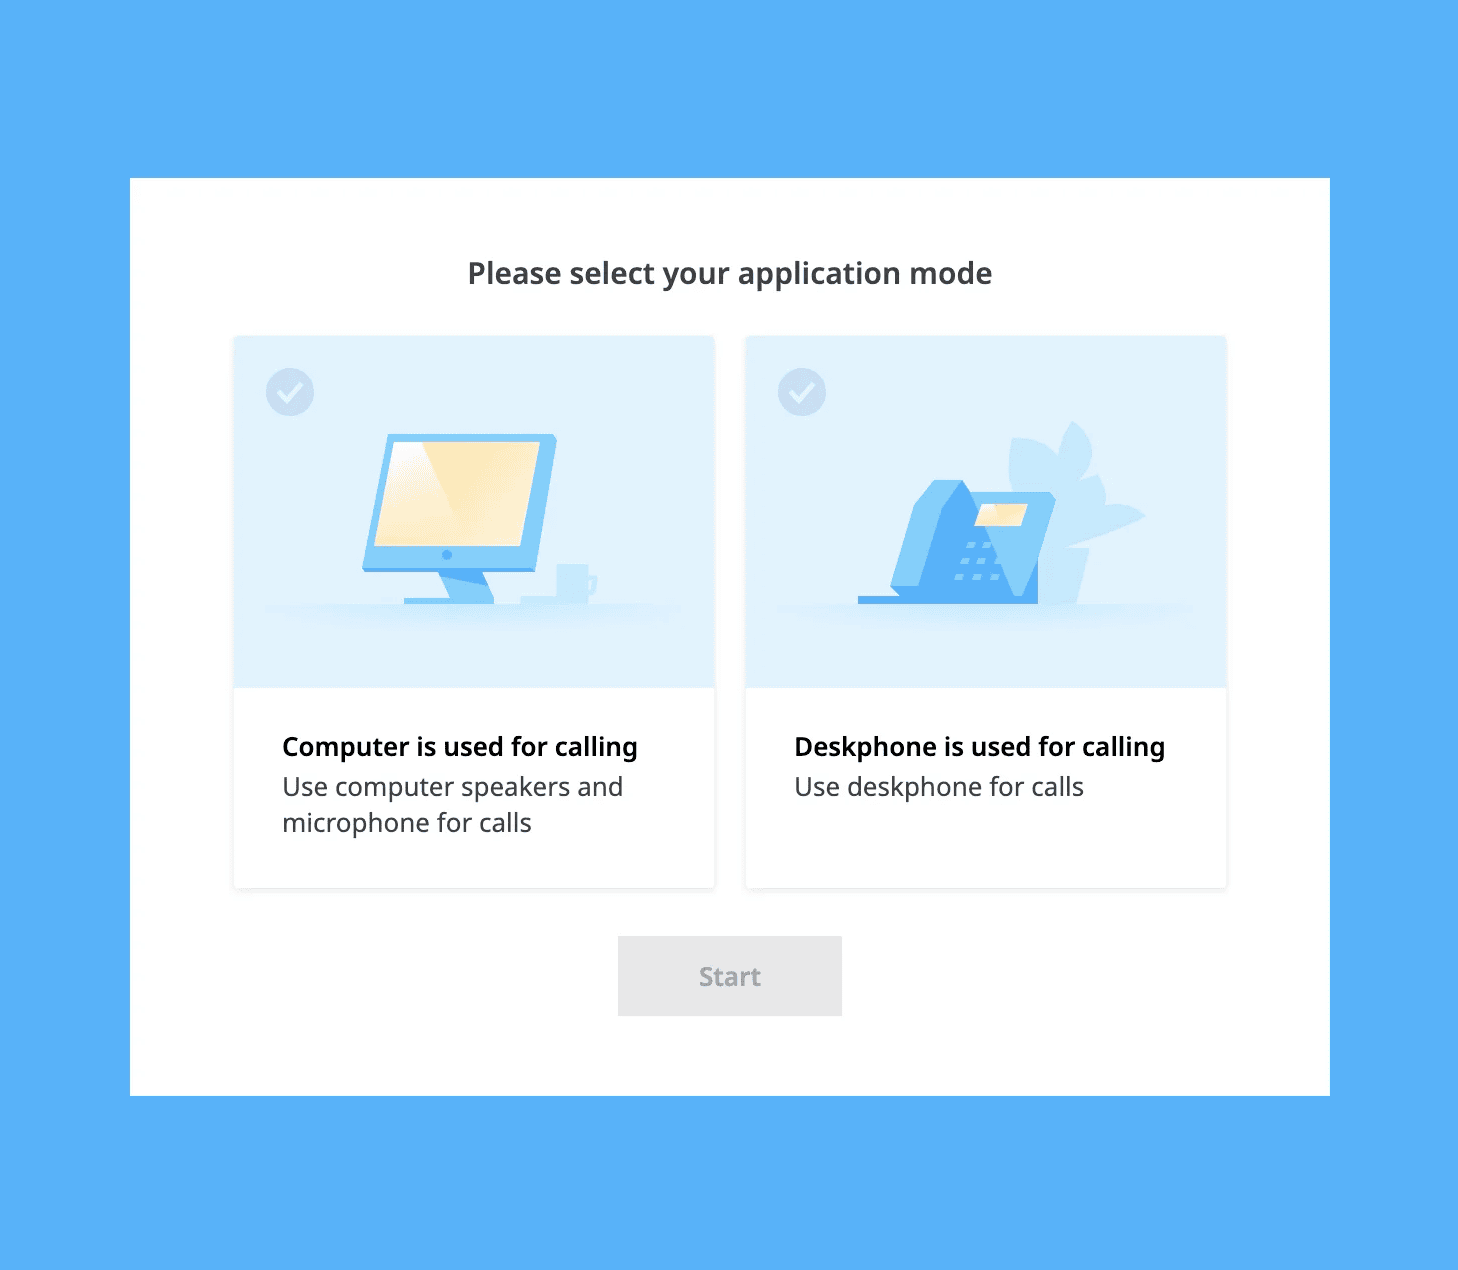
Computer softphone
In this mode, the application works as its own calling device. You can make, receive, and control phone calls directly through the application. A desk phone can be used in addition to the softphone, but is not required. This is a great option for a remote worker using their computer and a headset.
Desk phone controller
This mode allows the application to control your desk phone. Calls can be initiated through the application, but the call is actually placed through the physical desk phone. This mode enhances the experience for desk phone users by giving easy access to voicemail, call history, and contacts.
Placing calls
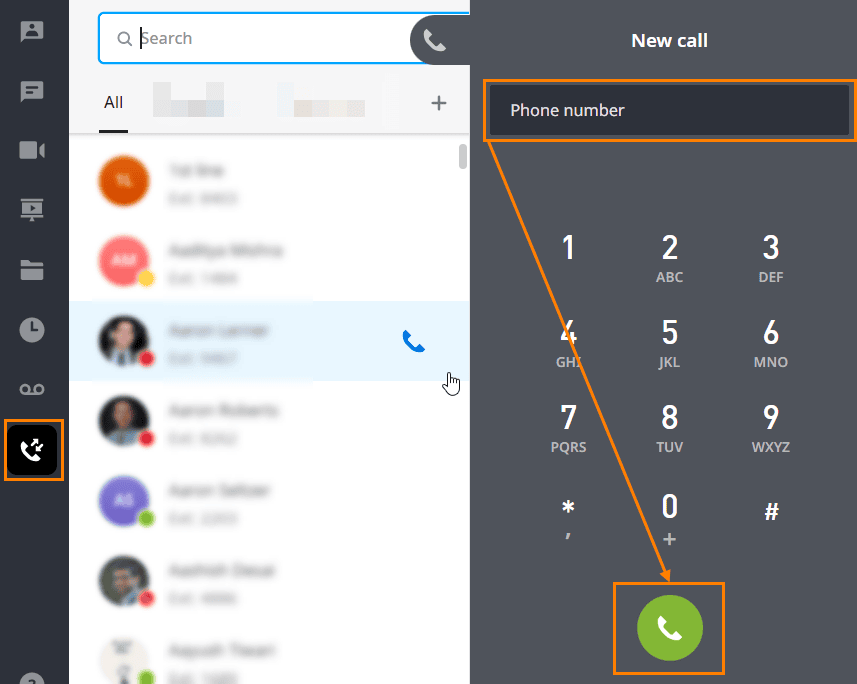
There are multiple ways to place calls in the Unite application.
Placing a call through the phone dialer
- Click the phone icon on the left-hand black sidebar
- Use the dial pad to enter a phone number
(You may click digits with your mouse or type them with your keyboard) - Click the green phone icon to place the call
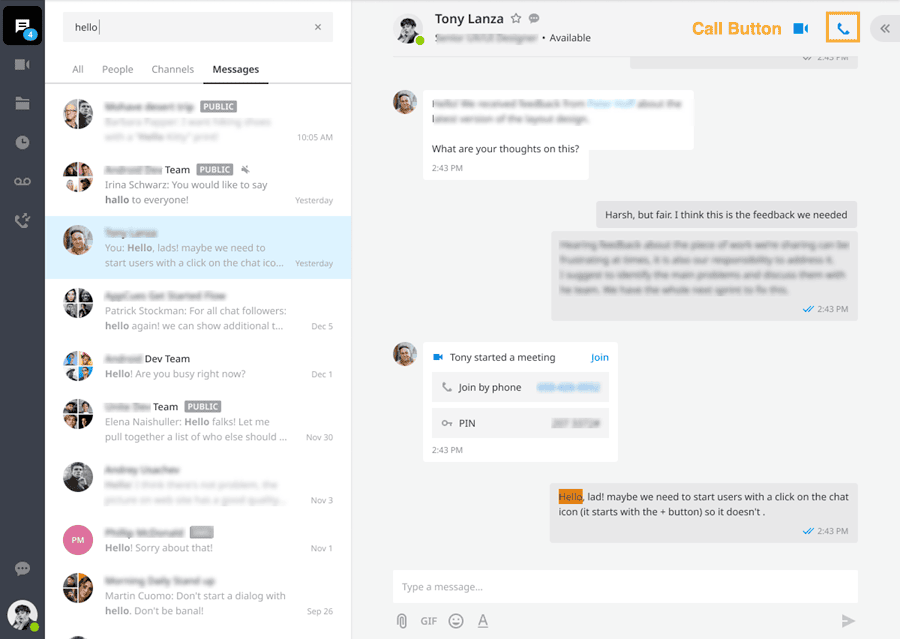
Placing a call through team chat
- Navigate to the chat of the individual you wish to call
- Click the blue phone icon on the top of the chat window
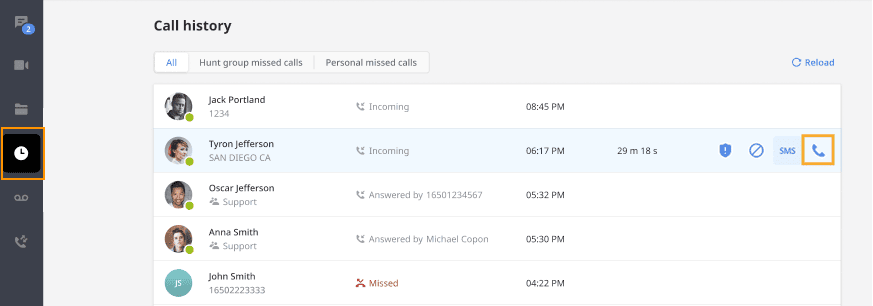
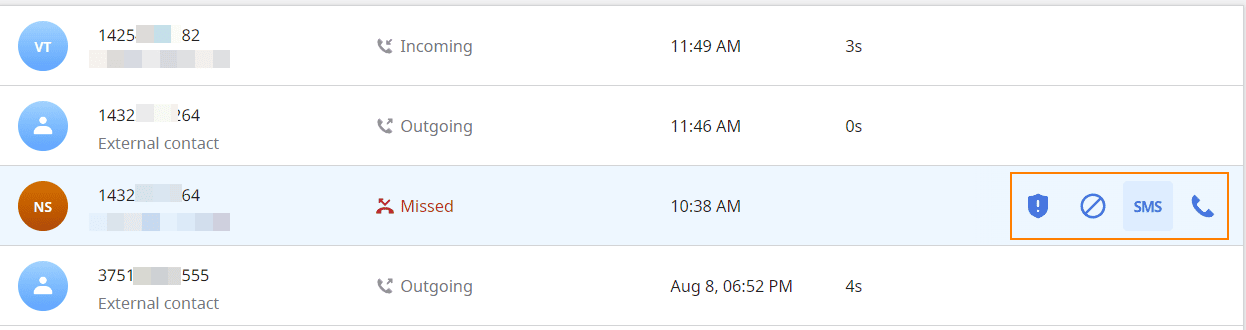
Placing a call through the call history tab
- Click the call history (clock) icon on the left-hand black sidebar
- Hover over the record to reveal more options
- Click the blue phone icon to place the call
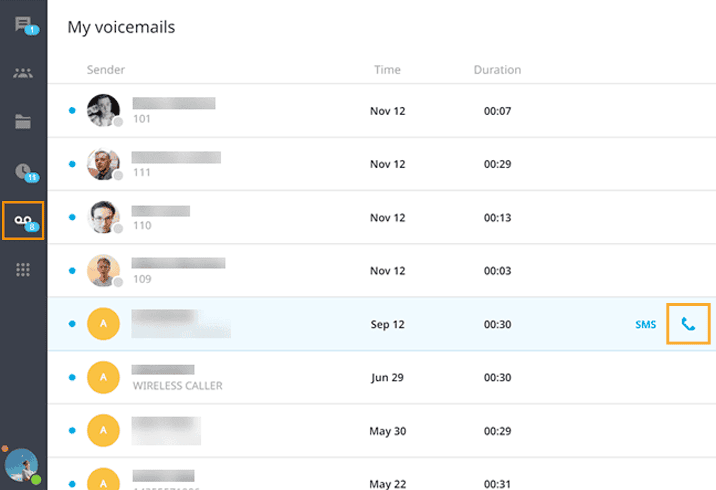
Placing a call through the voicemail tab
- Click the voicemail icon on the left-hand black sidebar
- Hover over the record to reveal more options
- Click the blue phone icon to place the call
Call flip
Call flip allows you to seamlessly move an active call to another device. For example, from your desktop application to your mobile phone.
- While on an active call, click the call flip icon
- The call will be placed on hold
- All other devices assigned to you will begin ringing (desk phone, mobile, etc.)
- Answer the call on the desired device and continue the conversation

Call park/pickup
Parking a call is like placing it on hold, but with one major difference – a parked call gets placed in a communal “call parking lot” where another available coworker can pick them up. A call remains “parked” until someone picks it up again.
- On an active call, click the park icon
- An automated voice will tell you the number of the parking slot the call was placed in
(example: “call parked on extension 901”) - The call can be picked up by anyone within the organization by calling that extension number

- Dial the extension number of the parking slot from any phone
- Desktop app users can also visually monitor parked calls, and can click on the parked call to pick it up

Transfer a call
Transferring a call to a teammate is easy, but it will help to understand the 3 different transfer types.
Warm transfer
Warm transfer allows you to consult with the party you are transferring a call to before completing the transfer.
- While on an active call, click the transfer icon
- Select a contact or use the keypad to type a phone number
- Click the warm transfer icon
- Your first call will be placed on hold, you will receive an incoming call from Caller 2; you will then need to select the Answer button to establish a call with caller 2
- Click on the Complete button to transfer the call
Blind transfer
- While on an active call, click the transfer icon
- Select a contact or use the keypad to type a phone number
- Click the blind transfer icon
Voicemail transfer
- While on an active call, click the transfer icon
- Select a contact
- Click the transfer to voicemail icon
Add a caller
You can conduct 3-way calls using your Intermedia Unite application or desk phone.
- Click the add caller icon (user with plus sign)
- The first call will automatically be placed on hold


- Use the dialer to type the number of the person you wish to add (or select a contact from your contact list)
- Click the merge call icon to create the 3-way call

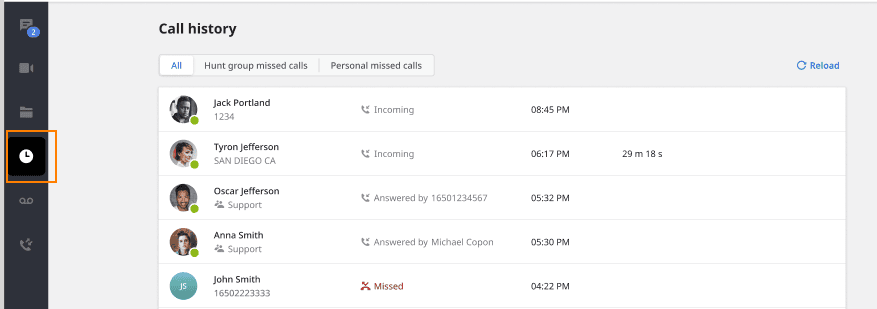
CALL HISTORY
The call history page allows you to view all calls or missed calls.
- Click the call history (clock) icon on the left-hand black sidebar
- Hover over the phone number to reveal more options, including call back, report spam, and block number
VOICEMAIL
Checking new voicemail
- Click the voicemail icon on the left-hand black sidebar
- Voicemail messages will be arranged by date
- New messages will have a blue circle icon on the left of them
- Click a voicemail message to see its details
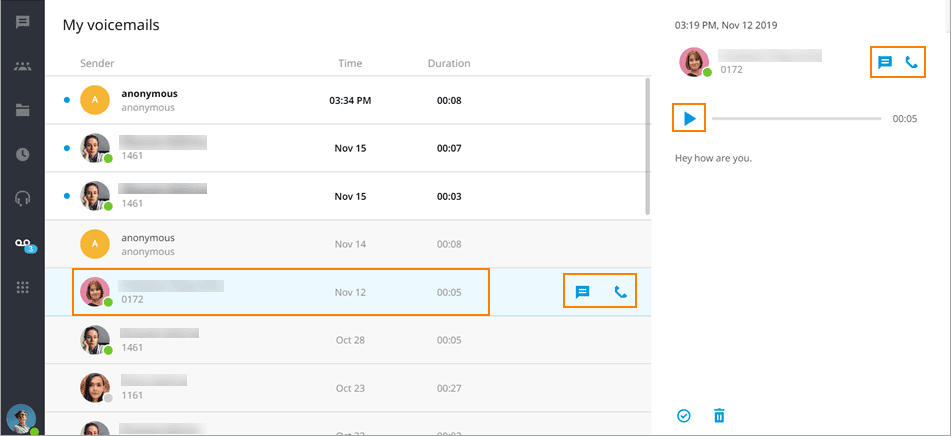
- The audio player will appear on the right side of the application window
- Click the play button to listen to the message
- Click the chat button to open chat with the person that left this message (if they are within your organizagtion)
- Click the handset button to call back the person
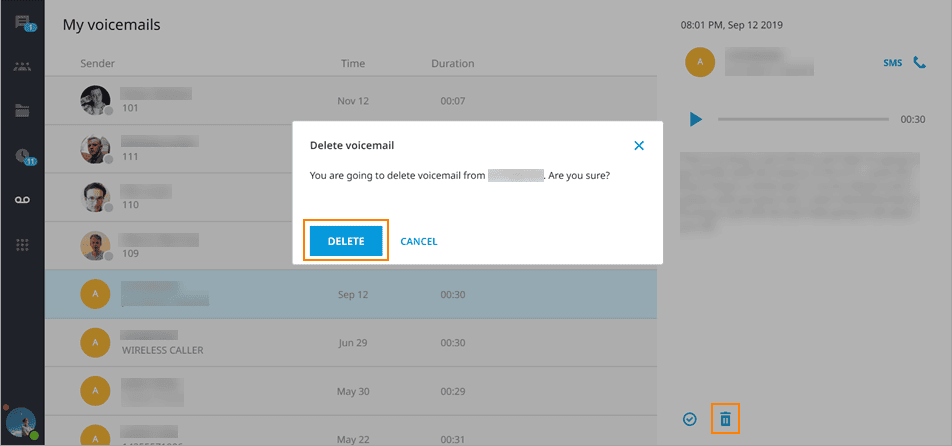
Deleting Voicemail
- Select the message by clicking it
- Click the Delete button on the bottom of the application window
- You’ll be prompted for confirmation on deleting the message
- Click Delete to confirm
- Deleting a message will delete it from all of your devices – including your desk phone
- Once deleted, the message can not be recovered
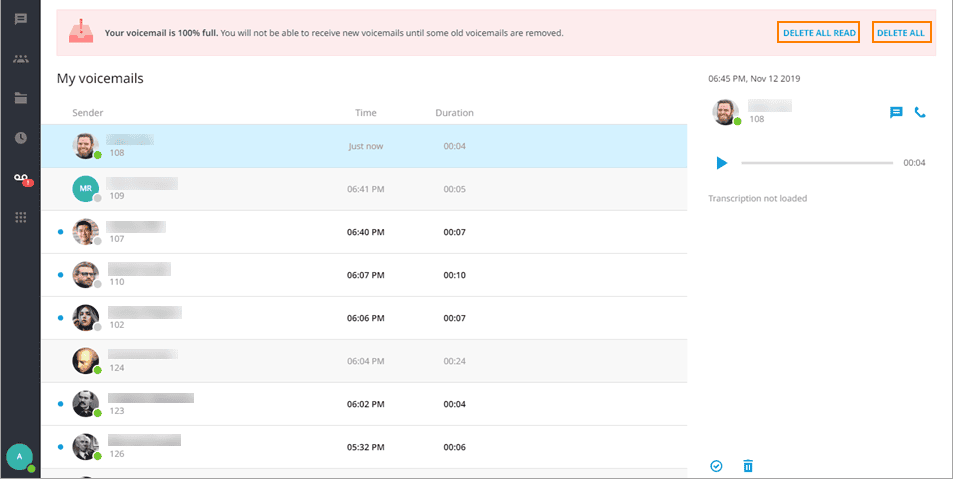
When the voicemail box becomes 80% full, you will see an orange notification banner with two buttons for bulk options: Delete all and Delete all read voicemail messages.

Important: when a voicemail box becomes 100% full, new voicemail messages will stop appearing in it.
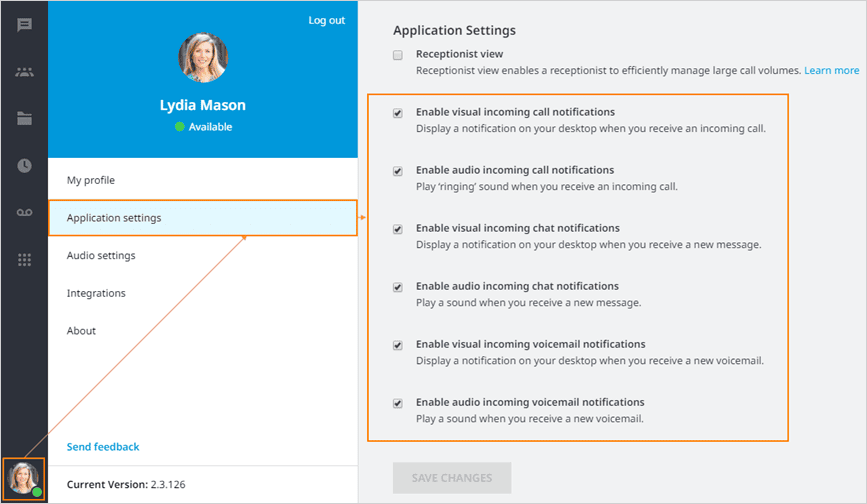
Voicemail notifications
Both audio and visual notifications can be personalized for new voicemails.
- Click on your avatar on the bottom left-hand corner
- Choose Application Settings
- Click or unclick the checkboxes to customize your notification settings
Elevate: How to transfer calls directly to Voicemail
Elevate users may use a star code to send a call directly to another extension’s voicemail box.
Transfer to Voicemail via Phone:
- When on a phone call, press the Blind Transfer soft key.
On different phone models this option can be accessed differently:
Polycom Press the Transfer soft key > Press the Blind soft key.
(Older models may require the user to hold the Transfer key and
select between Blind and Consultative options).Cisco Press the More soft key > Press the Blind Transfer soft key Yealink Elevate Press the XFER soft key - Dial * + <extension number> and complete the transfer by pressing Send.
Note: on the Yealink phones * key needs to be pressed twice in order for the * symbol to appear. Then OK softkey should be pressed.
- The caller will then be sent directly to that extension’s voicemail.
Transfer via Speed Dial Line Key
- When on a phone call, press the Blind Transfer soft-key, as described above.
- Press the designated line key and complete the transfer
- The caller will then be sent directly to the user’s voicemail.
Transfer to Voicemail via Elevate Desktop App:
- While on an active call, click the Transfer icon.
- Find the person you would like to transfer the call to via Search or Contacts
- Click Voicemail Transfer icon
- Alternatively, you can use a star code to send a call directly to another extension’s voicemail box: dial * <extension number>, for example, *113 to send the call to Voicemail on extension 113.
